How I AI: Jamey Gannon's Workflow for Consistent Brand Imagery in Midjourney
Learn how AI creative director Jamey Gannon builds stunning, consistent brand assets using a systematic workflow in Midjourney, refines details with Nano Banana, and creates realistic AI self-portraits for content.
Claire Vo
When I first came across Jamey Gannon's work, I knew I had to have her on the show. As someone who built the How I AI brand around a very specific (and very pink) aesthetic, I'm always looking for ways to create consistent, high-quality visuals. I can occasionally get a one-off image that looks great, but building an entire portfolio of assets that all feel like they belong to the same brand? That’s a whole different challenge.
Jamey is an AI creative director who has this down to a science. In this episode, she shared her incredibly pragmatic and repeatable process for generating beautiful and unique brand assets. What I loved most is that her method isn't about writing thousand-word prompts or having a deep technical knowledge of camera settings. Instead, she relies on a manicured process of visual communication with the AI, using mood boards, style references, and strategic iteration.
We unpacked her entire system, from creating an initial mood board to delivering a final brand package to a client. She even showed me a workflow for creating realistic AI self-portraits that has me rethinking my whole approach to creating thumbnails for the podcast. If you’ve ever struggled to get Midjourney to produce a consistent style, this is the episode for you.
Workflow 1: Building a Consistent Brand Aesthetic in Midjourney
The biggest challenge with AI image generation is consistency. Jamey’s core workflow is designed to solve exactly that, creating a unique and repeatable aesthetic without spending hours fighting with prompts. It’s a multi-step process that layers different visual inputs to guide Midjourney toward a specific style.
Step 1: Start with a Mood Board
Before ever opening Midjourney, Jamey starts by building a mood board on a tool like Pinterest or Cosmos. The goal is to collect images that capture the general vibe she's aiming for. For the demonstration, she wanted a look that was “very pink and cute, but still kind of not super girly, very internet coated.” Her board included fun juxtapositions like a grungy unicorn and a fluorescent fruit dog on a computer.
This initial collection of images serves as the visual language to communicate the desired aesthetic to the AI. As I always say, a picture is worth a thousand words—and for an image model, that's literally true.
Step 2: Test with Style References (SREFs)
Jamey’s first test involved using the entire mood board as a single input in Midjourney with simple prompts like beautiful female model or astronaut. The results were interesting, but they didn’t quite match the intended vibe—the contrast and saturation were off, and the overall feel was generic.
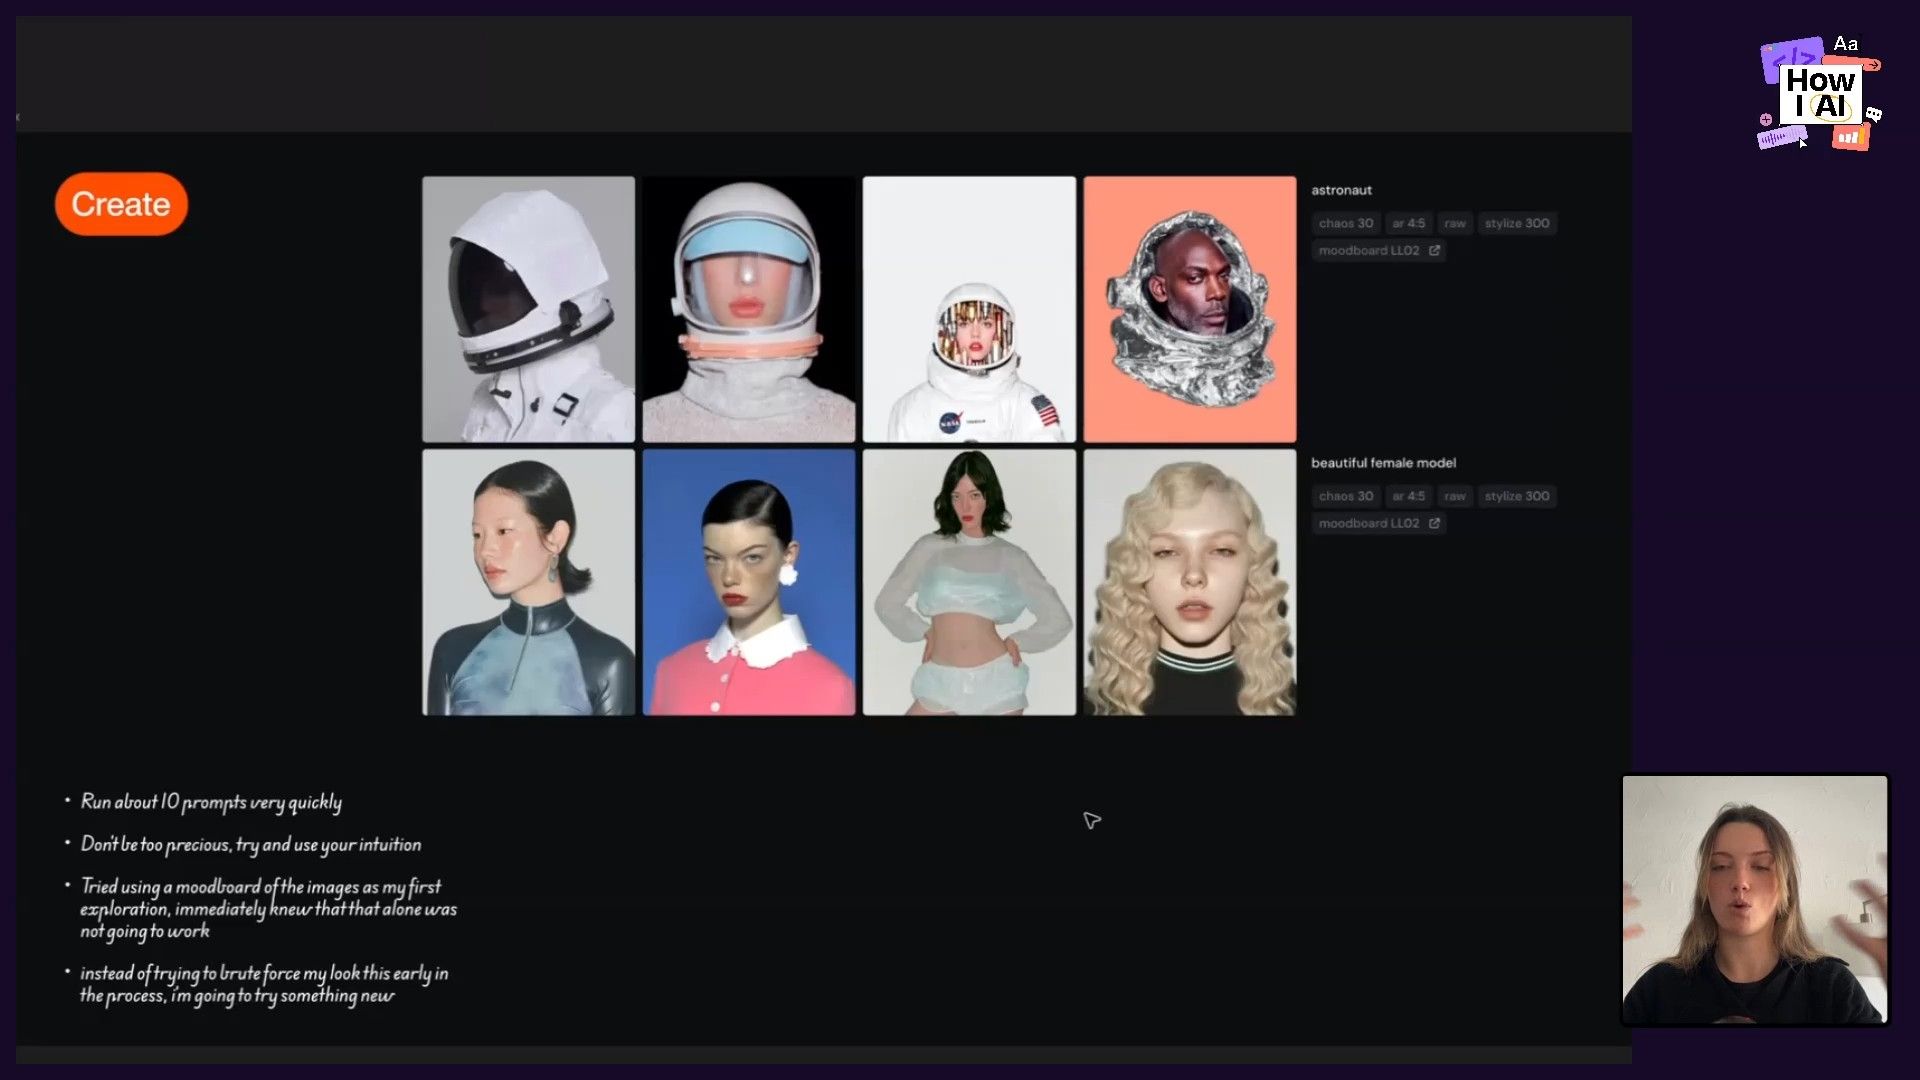
This is a common frustration. Jamey explained that when you provide a diverse mood board, Midjourney often averages the styles out. Her solution is to switch from using the whole mood board to using individual images from it as [Style References (SREFs)](https://docs.midjourney.com/hc/en-us/articles/32180011136653-Style-Reference). This is done right in the Midjourney UI by just dragging and dropping the images you want to use as style inputs.
This immediately got her closer, but the images were pulling too green. She identified the specific SREF causing the issue—an image with a dramatic green eye—and simply removed it. The next generation was much more neutral and closer to the target style. This shows how iterative and observational the process is; it's about identifying what's working and what isn't, then making small adjustments.
Step 3: Layer in Personalization Codes
To add another layer of unique style and get closer to a crisp, modern feel, Jamey introduced a Personalization Code. This is a feature in Midjourney where you train your own style preference by rating a series of images in a “this-or-that” format. You’re essentially telling Midjourney what you like, and it creates a reusable code that applies that taste to future generations.
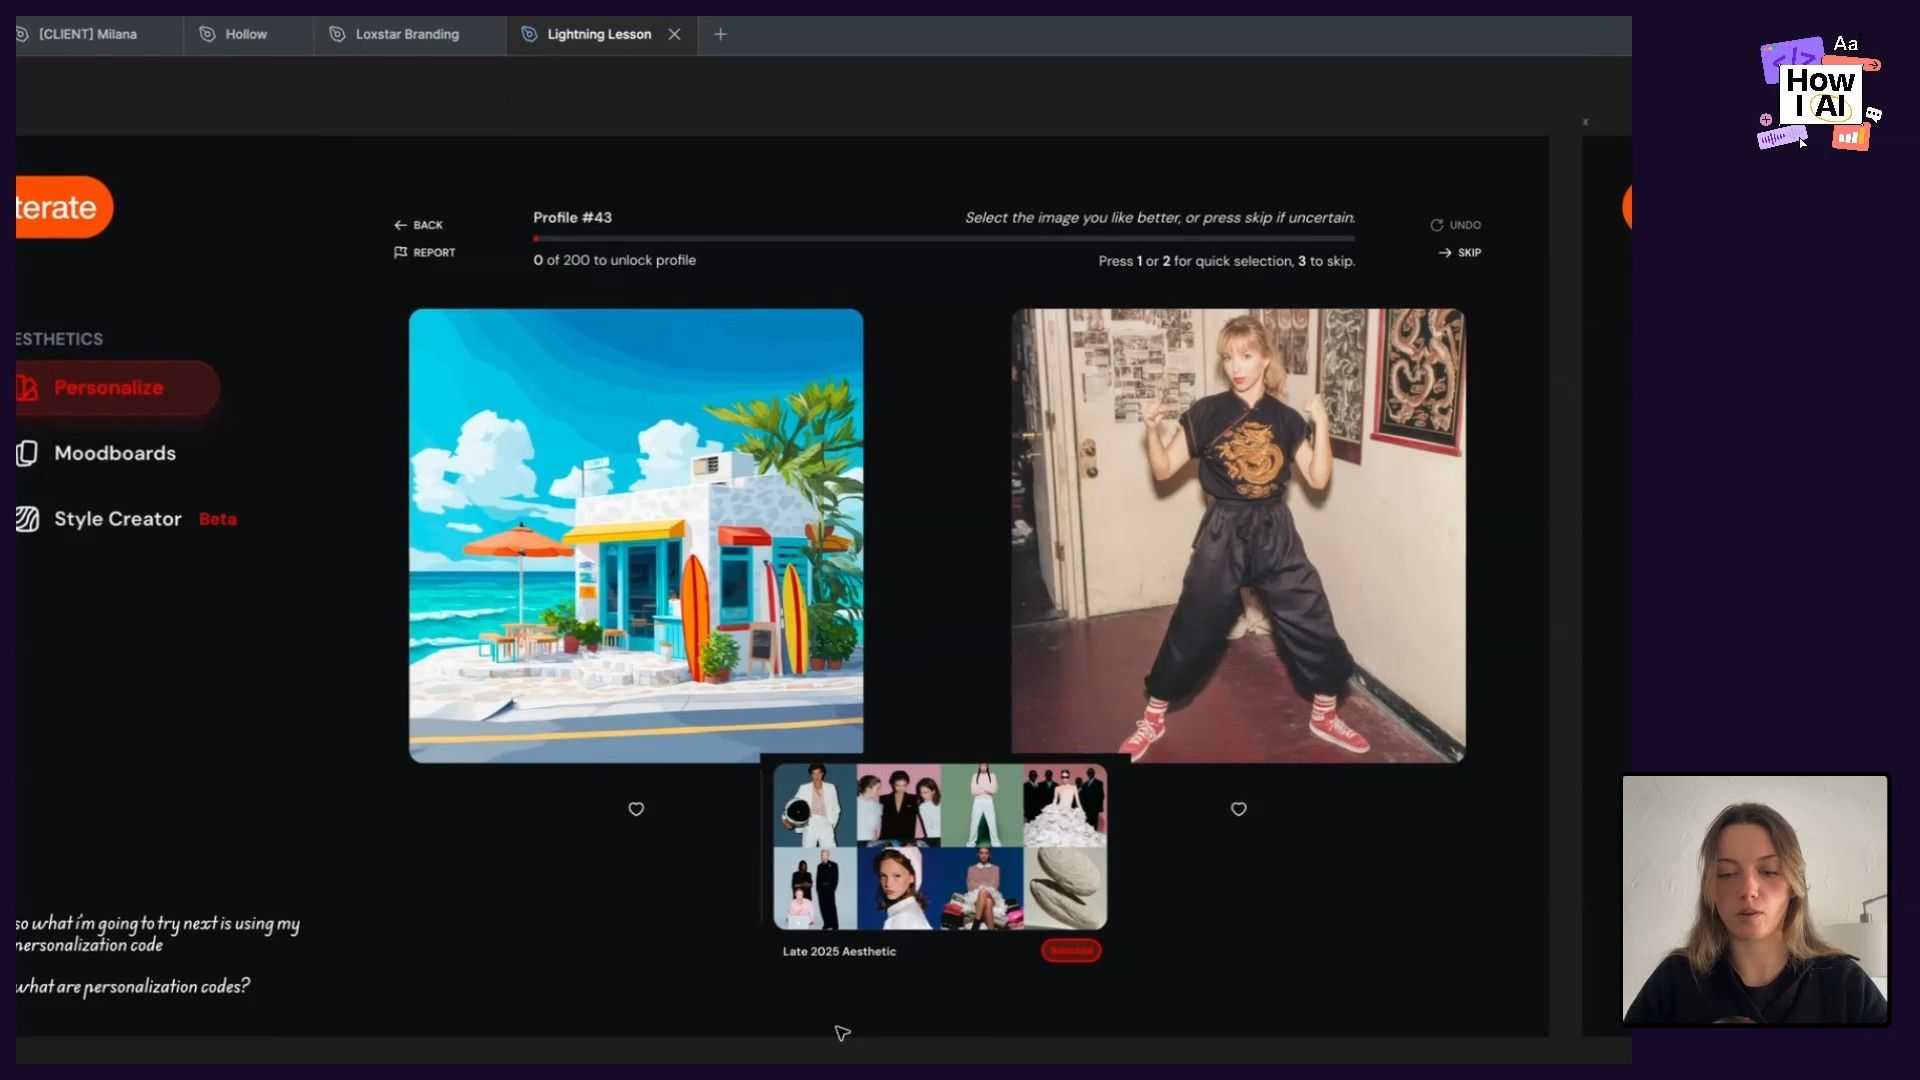
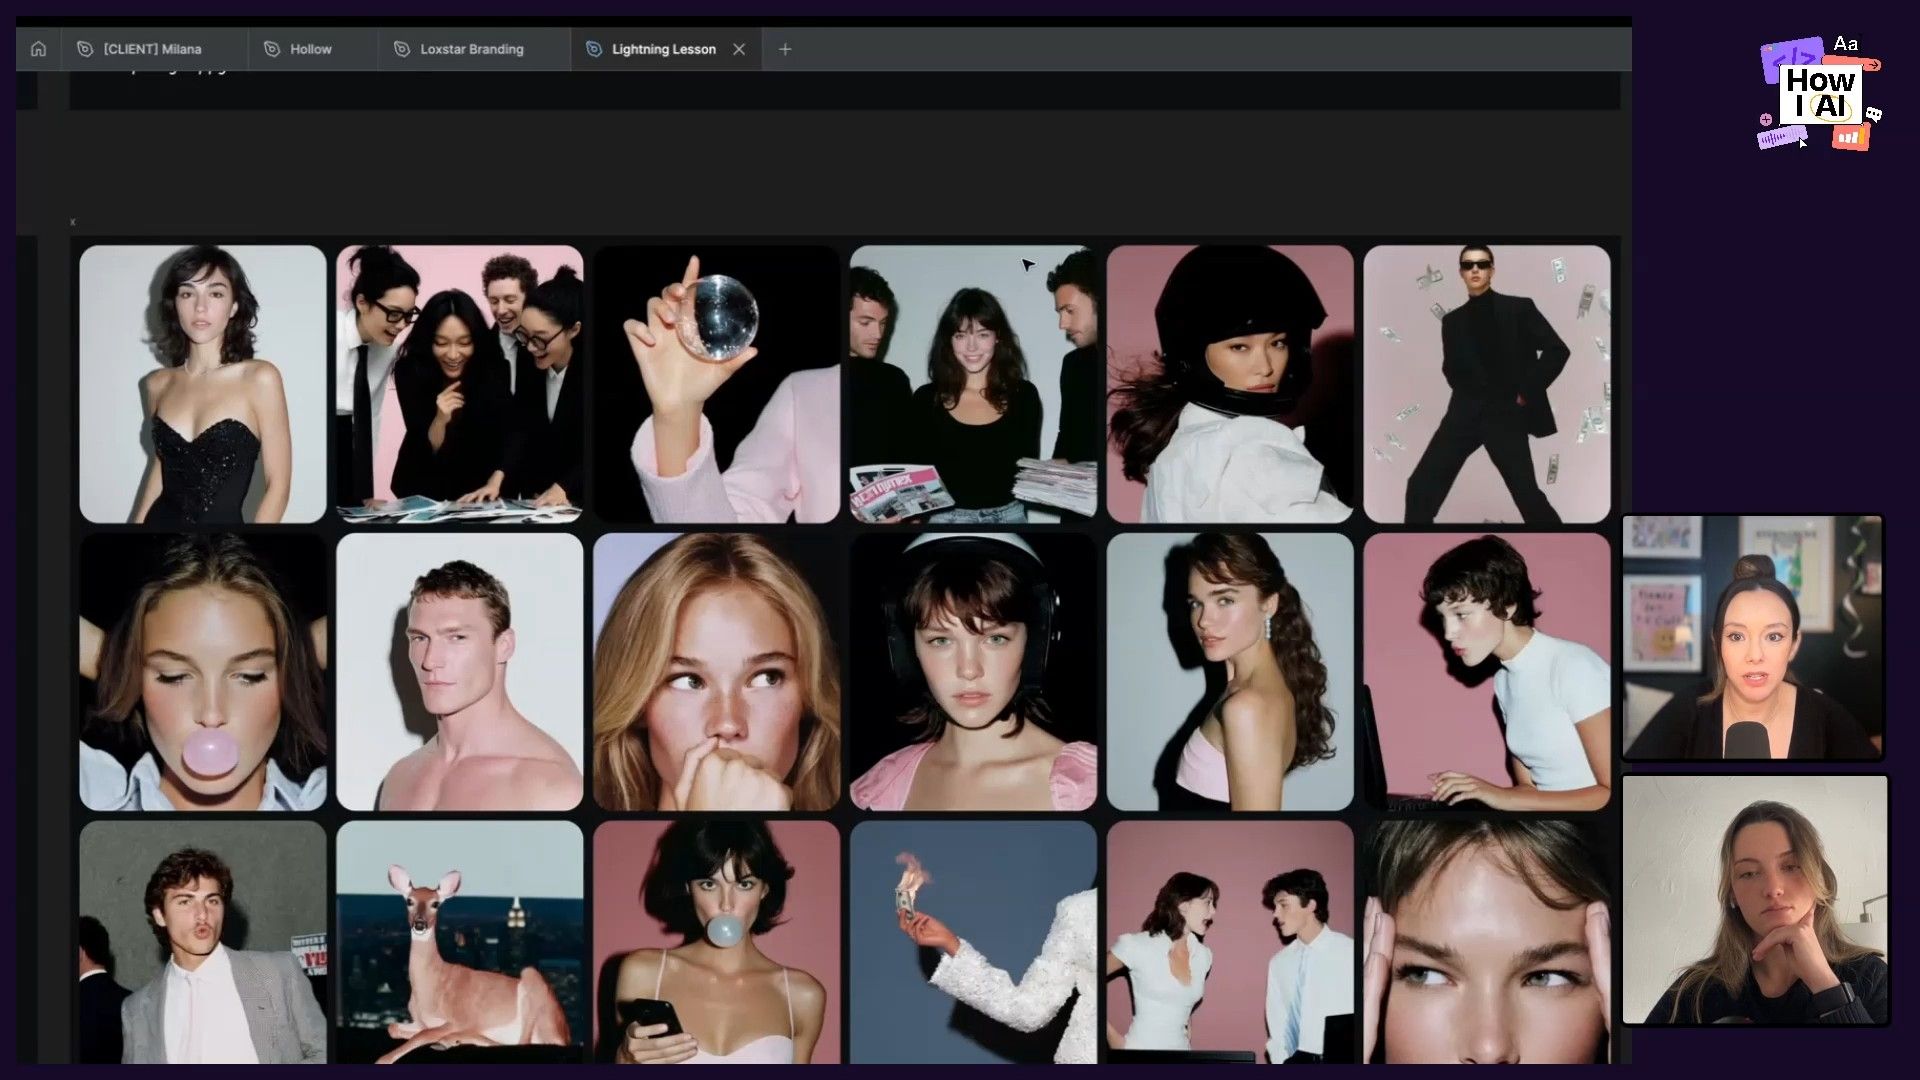
Jamey used her code, which she named late 2025 aesthetic, in combination with her refined SREFs. This helped add more depth, improve details like skin texture, and push the images toward the high-quality, iPhone-shot style she wanted. The key is that you can create multiple personalization codes for different aesthetics and layer them into your workflow.
Step 4: Iterate with Smart, Simple Prompts
Even with the visual references dialed in, prompting still plays a role—but Jamey keeps it simple and lazy. Instead of complex descriptions, she uses “cheat codes.”
- Publication Names: Using terms like
Dazed editorial photo shootorVoguetells the model a huge amount about the desired grit, contrast, and fashion level without needing to spell it all out. - Camera Types: Jamey keeps a list of camera names to use as style shortcuts. For a '90s digital look, she added
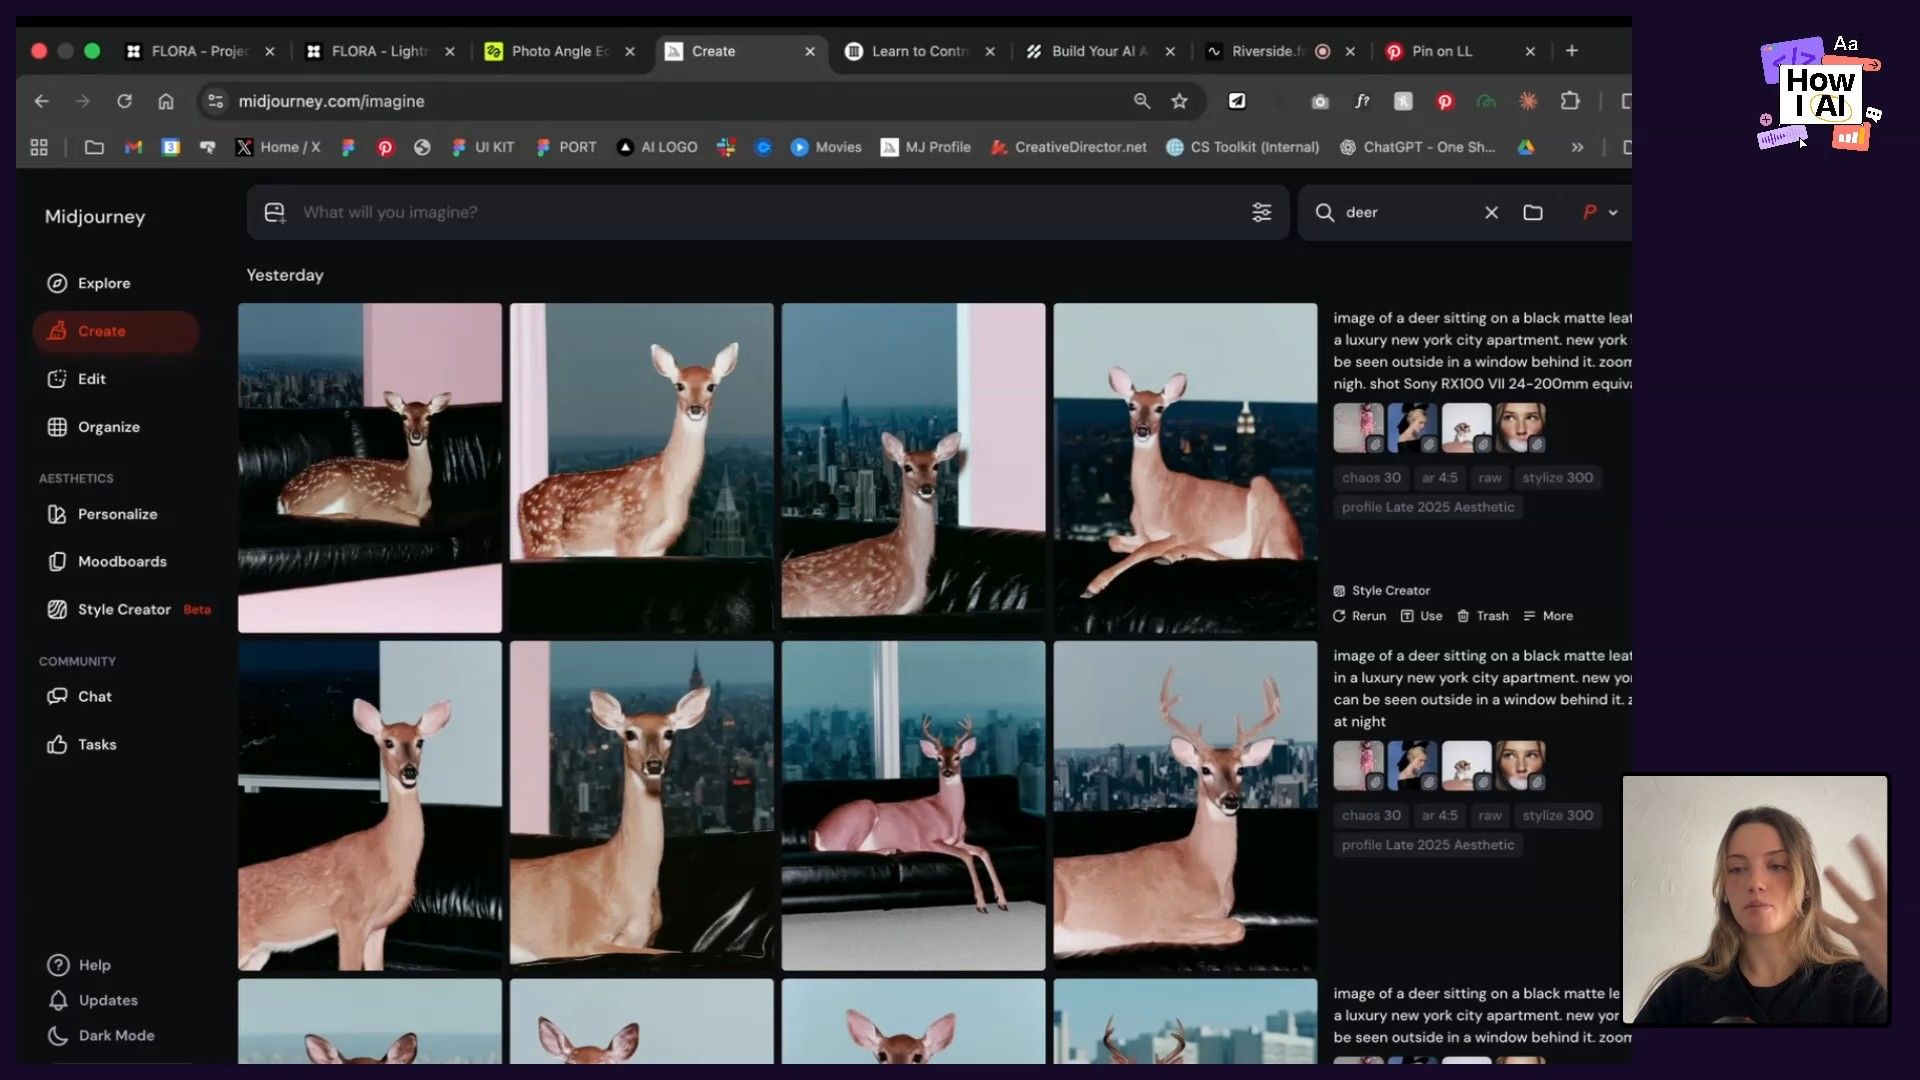
Sony RX100to her prompt. This is a great way to control the photographic style without knowing the technical details of aperture or shutter speed. - Descriptive, Human Language: When creating an image of a deer in an apartment, she started with a simple prompt. To get the city view, she simply added
New York skyline can be seen in the window behind it. To change the couch, she promptedon a matte black leather couch. The language is direct and uncomplicated.
Another brilliant technique she demonstrated was using Image References for composition, but with a twist. She wanted a profile shot and used an image of a woman blowing bubble gum as a reference. The AI fixated on the bubble gum. Instead of trying to prompt it away with no bubble gum, Jamey simply cropped the image to remove the bubble and used the cropped version as the new image reference. It worked perfectly.
Step 5: Package the Aesthetic for Clients
Once the aesthetic is defined, Jamey packages it for her clients in a Figma file. This is such a modern and empowering way to work with a creative director. Instead of just delivering a batch of images, she delivers the system itself.
The package includes:
- The exact set of Style and Image References to use.
- The specific Personalization Codes to apply.
- A few base prompts that work well with the aesthetic.
This allows the client to continue generating their own on-brand images long after the initial engagement is over. It’s a shift from being a gatekeeper of creative assets to an enabler of creativity.
Workflow 2: Refining and Upscaling Images with Nano Banana
Midjourney is incredible for generating ideas, but it’s not always perfect. We’ve all seen the infamous six-fingered hands or weirdly distorted objects. For fixing these imperfections, Jamey turns to other tools like Flora or, in this case, Nano Banana (part of Gemini), which she describes as “Photoshop you can speak to.”
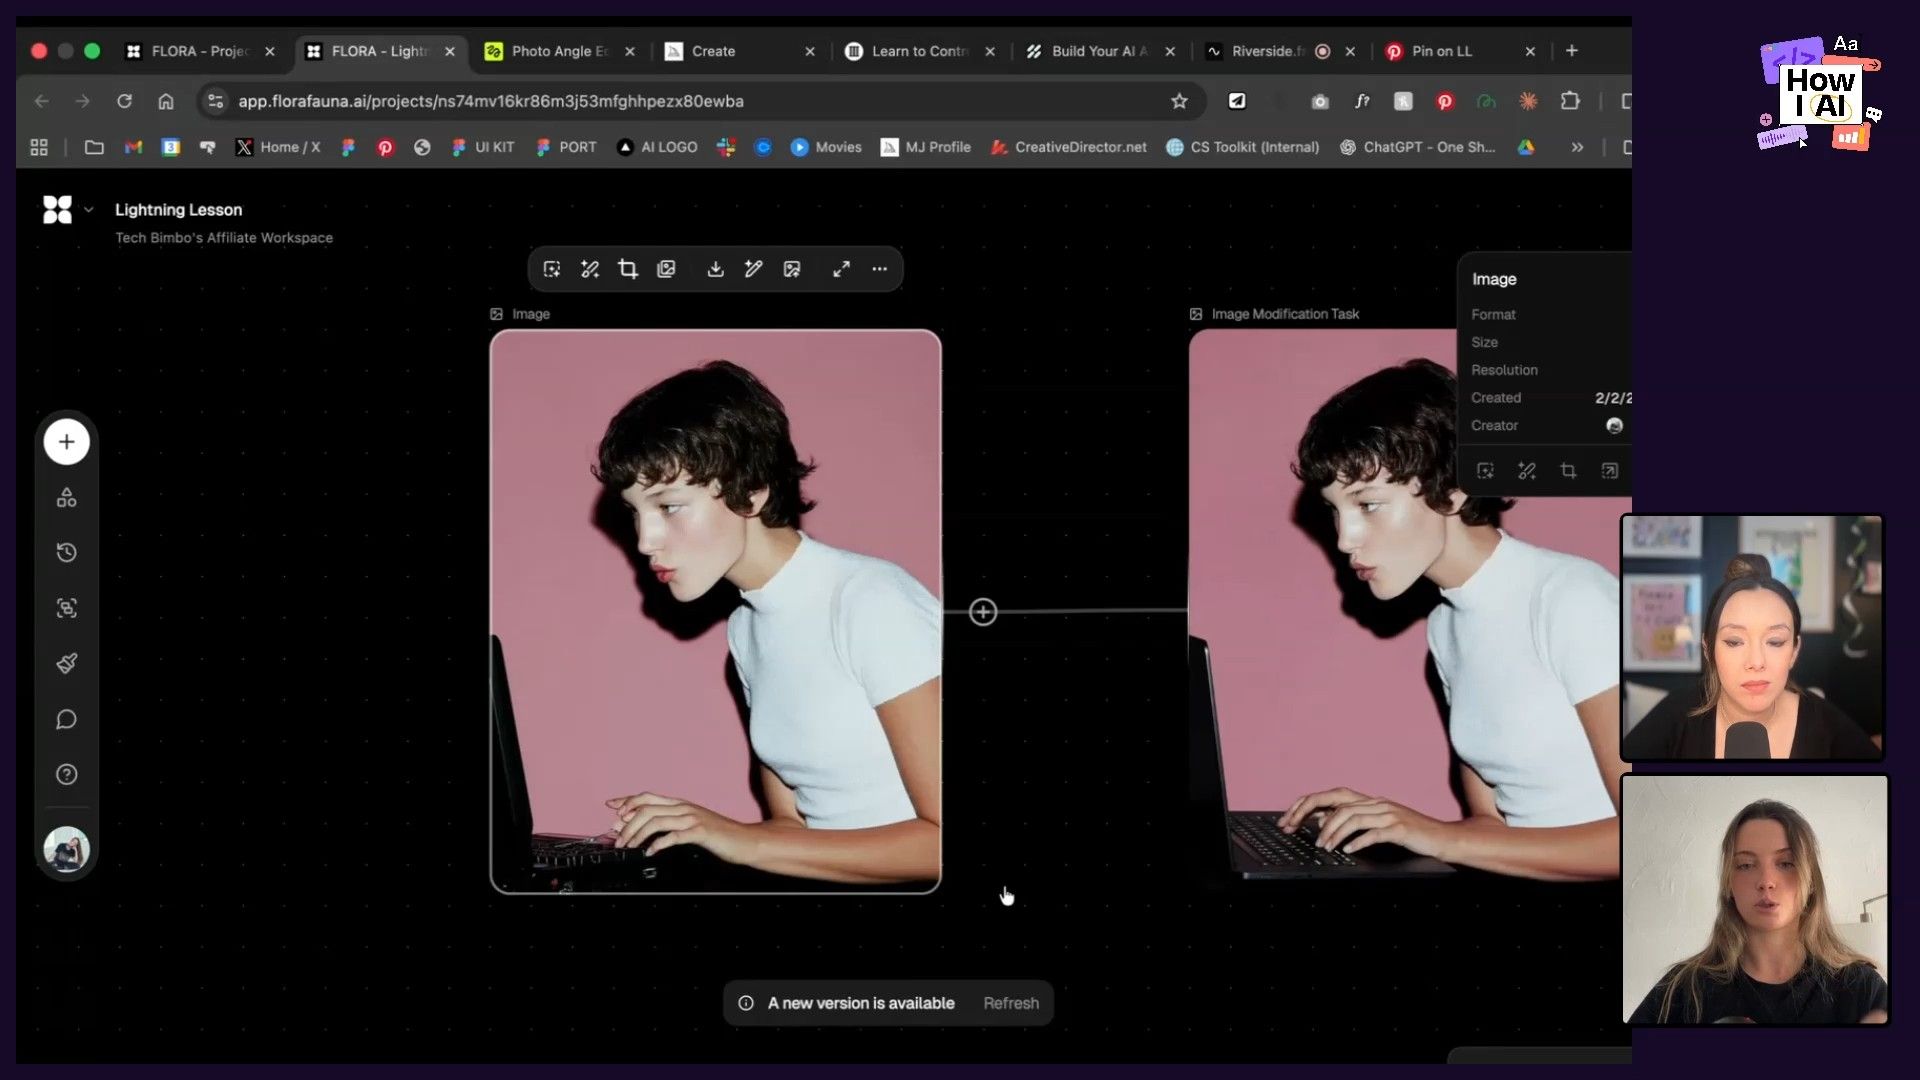
She showed an example of an image she loved, but Midjourney had generated a strange, anachronistic computer. Her workflow to fix it was straightforward:
- Upload the Image: Take the generated image from Midjourney and bring it into Nano Banana.
- Mask the Area: Select the part of the image you want to change (in this case, the computer).
- Prompt the Change: Use a very specific, descriptive prompt. She used:
replace the computer she's typing on, on a 2026 midnight Black MacBook Pro. keep the position and the size of the computer exactly the same. only the left side and the keyboard is visibleShe also added don't change anything else to ensure the rest of the image stayed consistent. Nano Banana, being a reasoning model, understands what a “MacBook Pro” is and can render it accurately in the correct position and perspective. This process also upscales the image, resulting in a high-resolution, polished final asset.
Workflow 3: Generating Realistic AI Self-Portraits for Content
This workflow was a game-changer for me. As someone who needs to create thumbnails and social media content constantly, getting good, expressive photos of myself is a pain. Jamey’s solution is to use AI to generate an endless supply of on-brand self-portraits.
Here's how she does it:
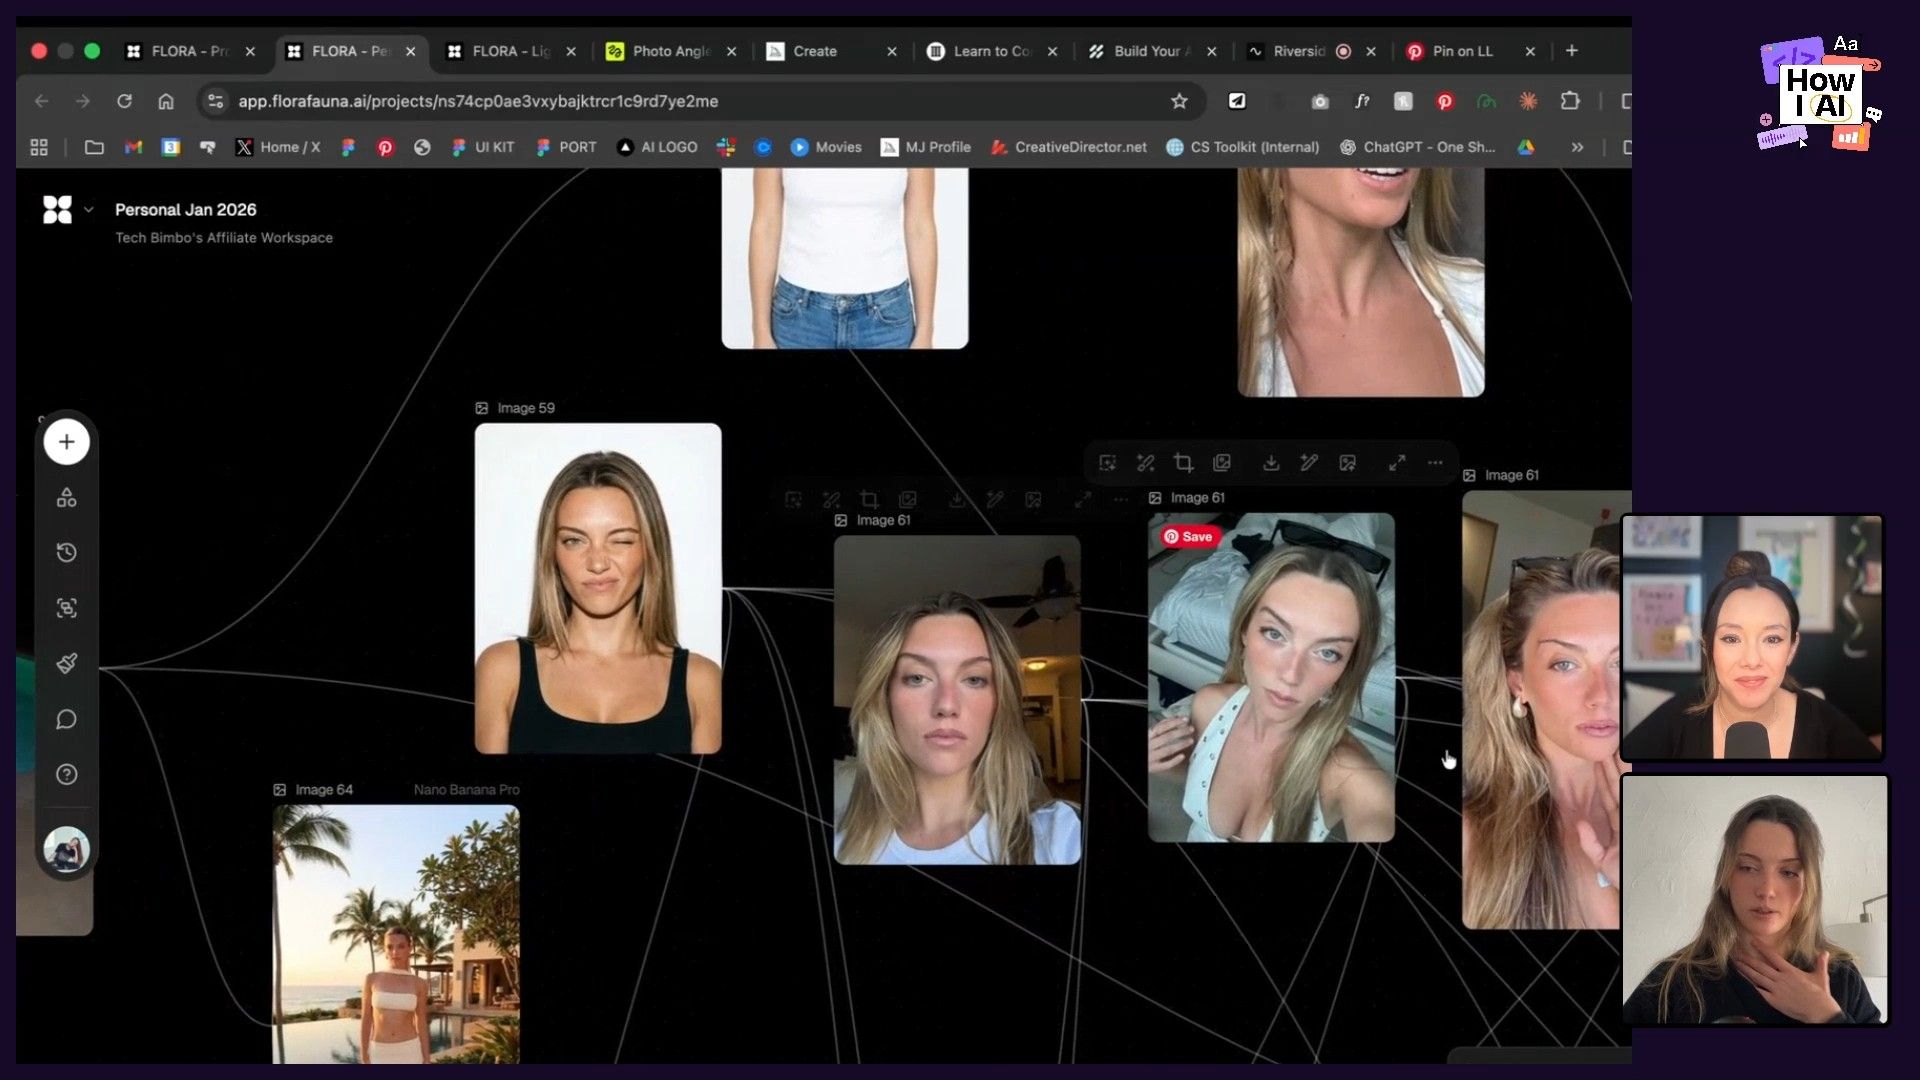
- Create a Reference Set: Take a bunch of realistic selfies. The key is variety—different angles, expressions, and lighting. She even makes sure to include photos that show her teeth, because she doesn't have perfectly straight teeth and wants the AI to capture that realism.
- Use Selfies as Image References: In a tool like Flora, she uses her collection of selfies as strong image references.
- Generate and Remix: With her face as a reference, she can then prompt herself into any scenario. She showed an example where she took a Midjourney image of a woman with an annoyed expression, then used Flora to replace that woman's face with her own, creating a perfect, custom image for an article she was writing.
This lets her generate custom, high-quality images for her articles on X and other content, all perfectly matching her aesthetic. My YouTube thumbnails are about to get a serious upgrade!
Final Thoughts
What I love about Jamey's approach is how it demystifies the process of creating great AI art. It’s less about being a prompt engineer and more about being a creative director who curates and combines visual elements. Her workflows are systematic, repeatable, and designed to give you more creative control with less effort.
The core lesson is to lean on visual language. Use mood boards to define your vibe, use SREFs and image references to guide the composition and style, and use personalization codes to bake in your unique taste. When you hit a wall, don't just write a longer prompt—take a break, re-evaluate your visual inputs, and be brutally honest about what is and isn't working.
I’m already thinking about how I can apply these techniques to my own projects, and I encourage you to try them out too. Start building your visual library on Pinterest, create your first personalization code, and see how you can create your own unique and consistent brand aesthetic.
A special thanks to our sponsors
Where to find Jamey
Find Jamey Gannon on her Website, LinkedIn, X, and Instagram. Check out her course, The AI Creative Director, on Maven.
Try These Workflows
Step-by-step guides extracted from this episode.

How to Generate Realistic AI Self-Portraits for Content
Create an endless supply of on-brand, realistic self-portraits for thumbnails and social media. This workflow uses a set of your own selfies as strong image references in a tool like Flora to generate custom images of yourself.

How to Fix and Refine AI-Generated Images
Use a tool like Nano Banana (part of Gemini) to correct imperfections in images generated by Midjourney. This workflow shows how to replace objects and upscale your images using simple, descriptive language.

How to Create a Consistent Brand Aesthetic in Midjourney
Learn a repeatable process to generate unique, on-brand images in Midjourney. This workflow uses mood boards, style references (SREFs), and personalization codes to create a consistent visual aesthetic without complex prompts.


