Team Collaboration
Set up a team when you sign up, invite teammates, manage seats and roles (including Access Manager), and collaborate on templates, chats and documents.
Teams let several people work in one ChatPRD workspace: share templates, collaborate on chats and documents, and connect team integrations. This page covers setting up a team, inviting people, seats and roles.
Set up your team when you sign up
New accounts start on a single setup page, Let's get started.:
- Under Choose a workspace for your first doc, pick On my own or With my team. For a team, choose one under Your team, or click Create a new team and enter a Team name.
- Optionally add people under Invite teammates. Type or paste email addresses, up to 10 at a time. They join as Members.
- Optionally fill in Personalize your drafts (your role, company and website) so ChatPRD knows your context.
- Click Start my first doc.
Invites never hold you up. If any fail, you can click Retry invites and start my doc, or Start doc without remaining invites.
Create a team later
If you started on your own, create a team from the workspace switcher at the top of the sidebar, or from Settings > Team. To add paid seats, go to Plans, choose how many seats you need and check out. Then invite your teammates.
Invite teammates
- Go to Settings > Team.
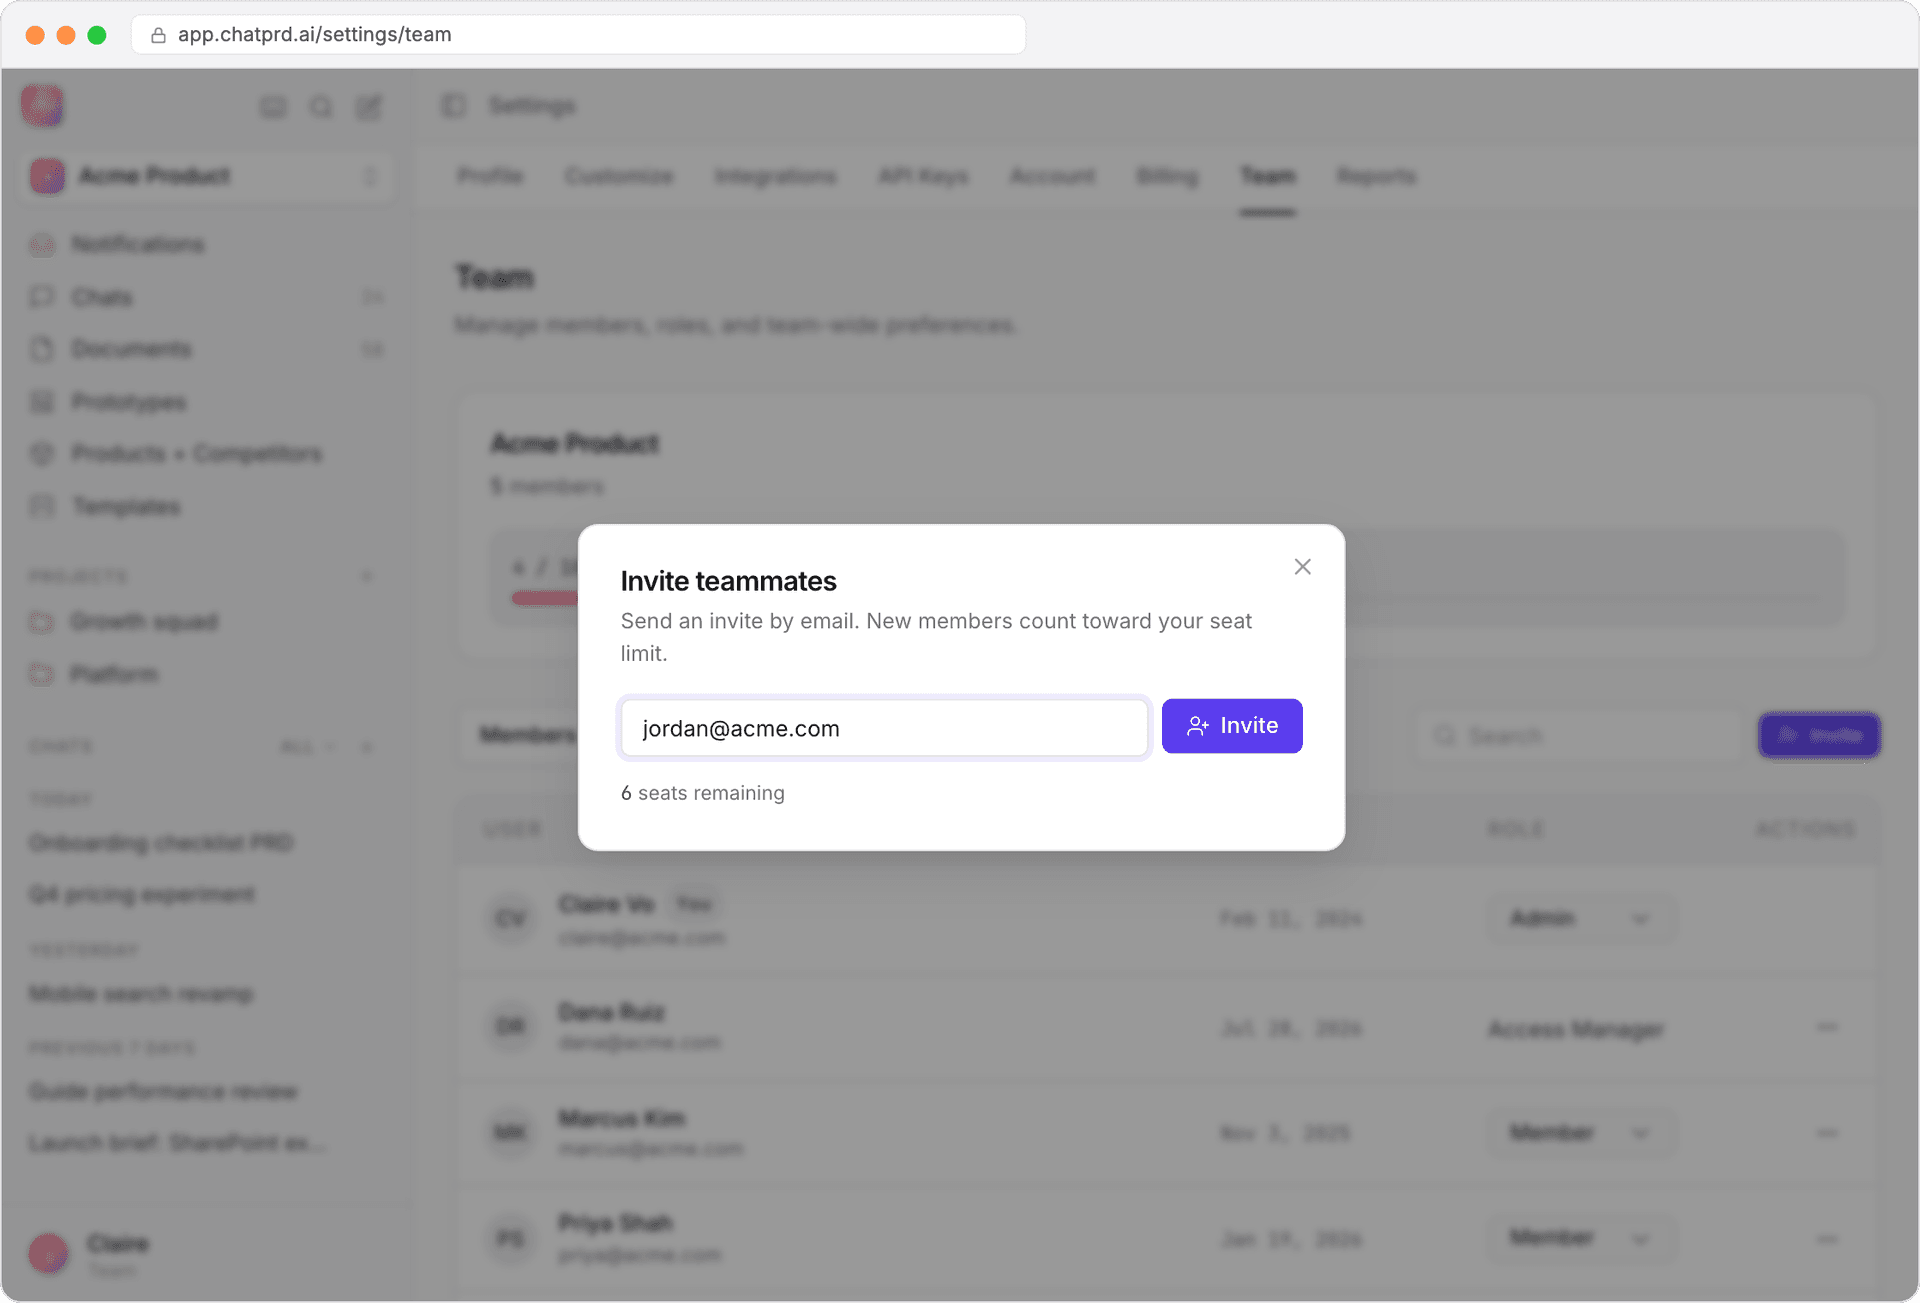
- Click Invite.
- Enter an email address and click Invite. You'll see Invitation sent to and the address.
New members join as Member. Pending invitations count toward your seat limit.
Accept an invitation
Invitees get an email. Clicking it opens ChatPRD; anyone without an account creates one first, then joins the team.
Manage pending invitations
Open the Invitations tab in Settings > Team to see who hasn't joined yet. Choose Revoke invitation to cancel one. To resend an invite, revoke it and invite the person again.
Manage members and seats
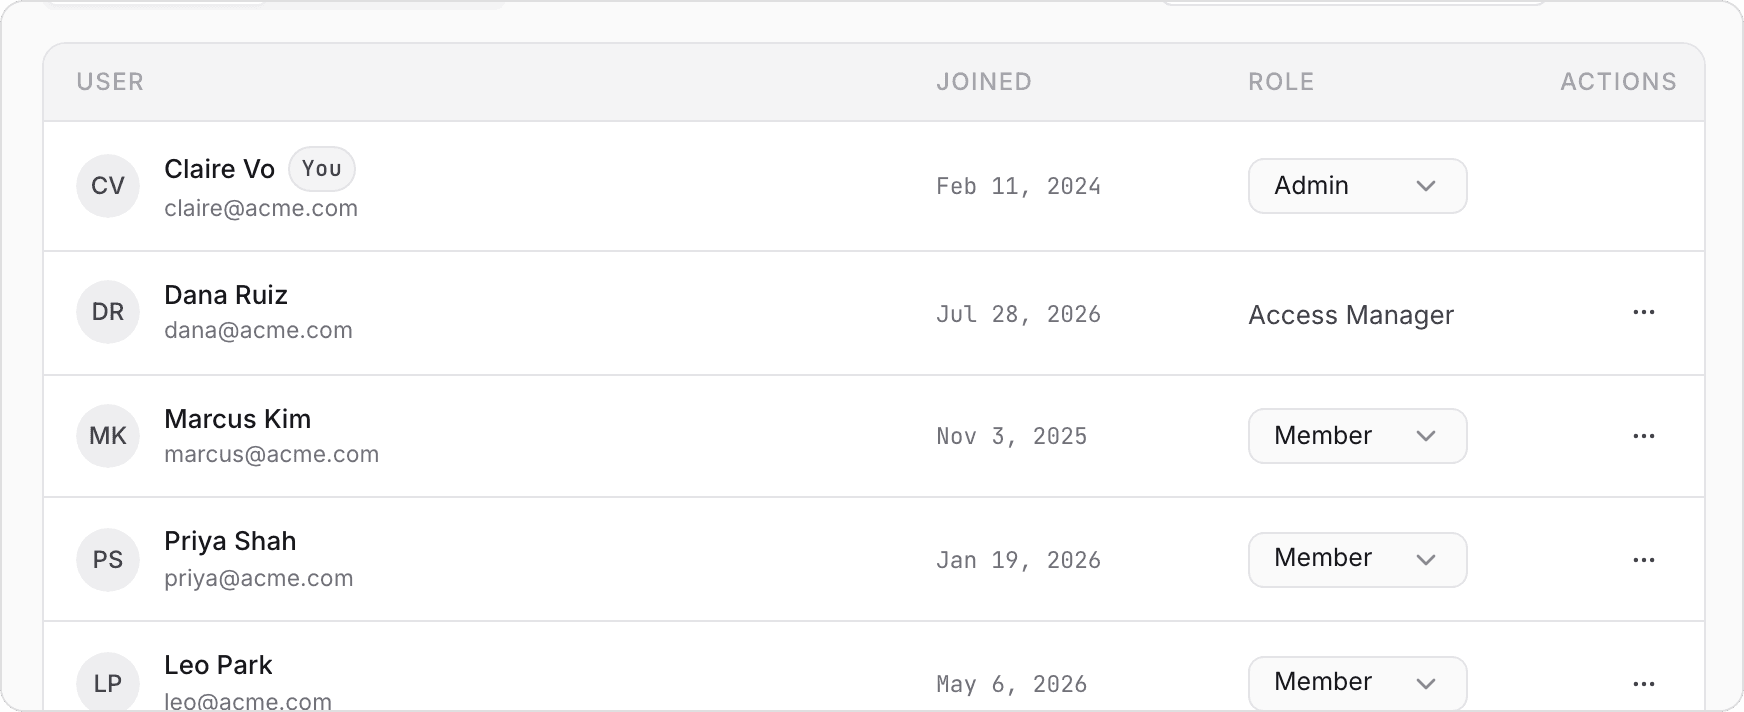
The Members tab in Settings > Team lists everyone on the team with their role, and shows how many seats are used.
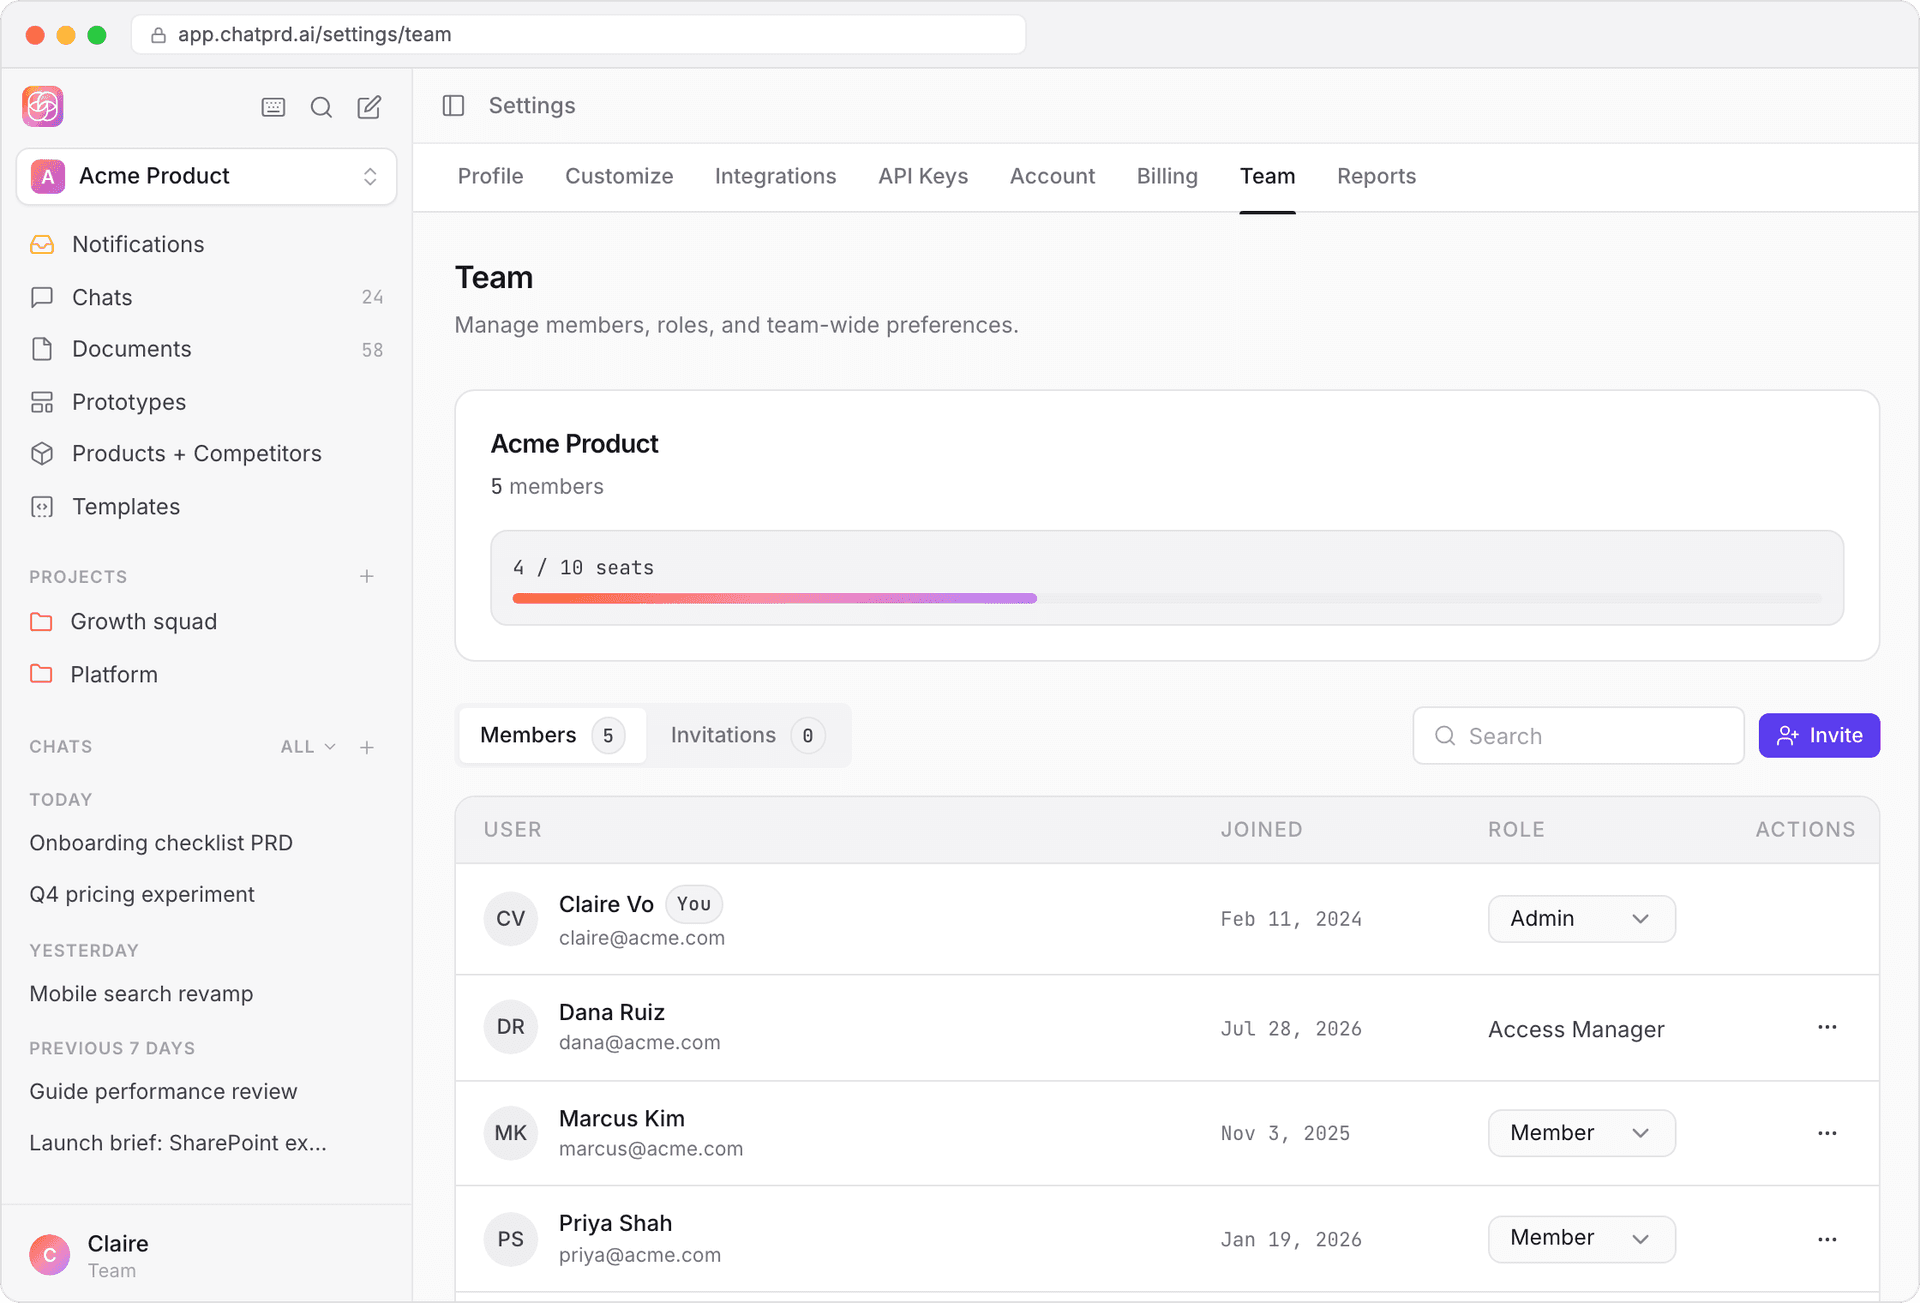
- Change a role: Admins can switch a member between Admin and Member in the Role column.
- Remove someone: open the ⋯ menu on their row and choose Remove member.
Seats. Free teams include five seats, including yours, and pending invitations count too. When you need more, Admins see View Teams plans (or Manage seats on a paid plan). Members who can't manage billing see Ask an admin, which gives them a request to copy and send to an Admin or Access Manager.
Roles
| Role | What they can do |
| Admin | Use ChatPRD, manage team settings, invite and remove anyone, change roles, and manage billing. |
| Member | Use ChatPRD and the team's shared templates, projects and integrations. |
| Access Manager | Manage members and billing without using ChatPRD. Doesn't take a paid seat. |
Only Admins can change roles, and only Admins can invite another Admin.
Access Manager
An Access Manager looks after people and billing for the team, without using chats or documents, so they don't take a paid seat.
| An Access Manager can | An Access Manager can't |
| Invite and remove Members | Make anyone an Admin |
| Revoke invitations | Change or remove Admins or other Access Managers |
| Manage billing | Use chats, documents or integrations |
In Settings, Access Managers see only Account, Billing and Team. The role isn't in the role picker: to make someone an Access Manager, contact support@chatprd.ai.
Work together
- Shared templates: share a template with your organization from its menu, or with the share switch in the template editor. See Creating & Using Templates.
- Shared chats and documents: share chats and documents with teammates and edit documents together in real time.
- Projects: group related chats, knowledge and files so the whole team works from the same context. See Creating & Using Projects.
- Team integrations: connect tools like Slack, Linear and SharePoint once for the whole team.
Best practices
- Pick roles deliberately. Keep Admins to the people who manage the workspace, and use an Access Manager for billing.
- Agree on naming for projects, templates and documents.
- Use projects to keep related work together.
- Share your best templates so documents stay consistent.
- Connect your team's tools, like Slack and Linear, so work flows where your team already is.
For more help with your team, contact support@chatprd.ai.